
From the unpublished Vault: Beachy curtains
February 08, 2017
There is a collection, let's call it the 'pile of doom', of projects that sit unfinished waiting for the day I will gather the motivation, renewed faith or sometimes just the missing pieces and make something great out of it. Sometimes I spend the time collating and assessing said 'pile of doom' in the hope that just maybe, maybe this time something will get finished. There was once a time where this pile only extended to craft projects but these days it has spread to include blog posts, story ideas and books that were cool but not cool enough for my undivided attention.
,
At some point during my "younger years" I got overconfident with my sewing skills. Nothing was too hard to make! I decided, considering there was a hole in the lining of the current curtains that I would sew new curtains for our caravan.
Sadly my knowledge and skill were severely lacking and the project was left unfinished. Since that day there have been blankets over the windows. That was over a year ago...
Fast forward to now; I'm still not sure about my skills, but a few YouTube and blog tutorials later and I think I'm really ready to tackle the project again! This time, hopefully with a better result! *gulp*
***
Now a note that I learnt in making these curtains which made me panic (momentarily). If you intend to use patterned fabric (as I have) and need more than one width of fabric to make a single curtain then each section (technically known as drops) needs to be cut so that the pattern follows across. This uses extra fabric and isn't necessary, just aesthetically pleasing. Thankfully the width of the fabric was enough to make one curtain so that while the pattern on the two curtains won't follow across at the centre where they meet it won't be as obvious as if multiple panels were joined.
***
It's moments like this that makes you realise that sewing is 40% knowing what you're doing and the techniques involved and 60% confidence that you can actually do it.
***
 Really it just took a lot of lining up aspects of the pattern to ensure a straight line across the top. As I said before the gathering tape is just placed along the top, about an inch away from the top edge (so that you have a little over the top of the curtain rod).
 A line of stitching is needed along the top and bottom of the tape to secure when gathered.
 All that is left to complete the curtains is to hem to the desired length. I decided to create an invisible hem and hand stitch along the bottom.
 This is a great idea and really gives a really nice hang but the process takes literally forever, I got one set in and decided that really, hand sewing was probably the worst idea ever and just did the second set with my machine. (Which really looks just as good).
***
Finally all that is left to do is hang and gather.
 Every three or four loops I threaded one of these thingyamabobs (pictured above. They are apparently gathering hooks) which connect with the slider bits on the curtain bracket (in case you hadn't realised these curtains aren't looped over a rod they go on a draw string bracket). Gather AFTER hanging to get the correct amount of gather and tie off the little strings.
***
In an effort to complete some of these posts because I liked the ideas, I have come up with a series; 'From the Vault'. The idea works like this: At the start of the post I'll give you a date and maybe a little run down of what was going on (if only for my benefit too) and then continue with the post as planned originally.
I'm excited anyway.
And here is number 1
January '16
Beachy Curtains for our Beachy retreat.
Heads up; This was my first attempt at making curtains. I decided to document it in case I ever attempted it again and to show that some projects may look scary but really, with confidence, and the help of Google, can be done.
I also had very little choice on the making front. Something had to be done because I had pulled down the original curtains and had nothing to hang to stop the sun. Money was going to be spent on curtains of some type and I had the need to prove myself (to no one in particular).
So this post sat in limbo for a long time waiting for a few little sections to be added and the final set of curtains to be hemmed and hung so that I could take the final 'done' photo.
This post is also written in sections as I went through the process with *** symbolising the next period of time
So here goes...
Sadly my knowledge and skill were severely lacking and the project was left unfinished. Since that day there have been blankets over the windows. That was over a year ago...
Fast forward to now; I'm still not sure about my skills, but a few YouTube and blog tutorials later and I think I'm really ready to tackle the project again! This time, hopefully with a better result! *gulp*
 |
| The van we own is down by the beach (the only place, in my opinion to have a caravan) so that to match with the beach feel of the surrounds I chose quite a beachy fabric. Sadly it is unlined and I'll have to add a block-out lining. |
Now a note that I learnt in making these curtains which made me panic (momentarily). If you intend to use patterned fabric (as I have) and need more than one width of fabric to make a single curtain then each section (technically known as drops) needs to be cut so that the pattern follows across. This uses extra fabric and isn't necessary, just aesthetically pleasing. Thankfully the width of the fabric was enough to make one curtain so that while the pattern on the two curtains won't follow across at the centre where they meet it won't be as obvious as if multiple panels were joined.
***
It's moments like this that makes you realise that sewing is 40% knowing what you're doing and the techniques involved and 60% confidence that you can actually do it.
And you CAN do it! Just cut that fabric and get sewing!
***
***
There are two ways to attach the lining to the patterned outer fabric:
The first uses lining the same size and creates a folded over hem


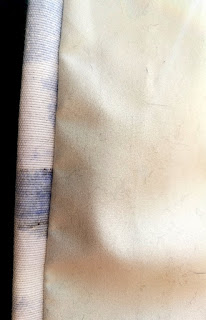
The second involves lining about an inch (or the hems width) shorter on each side. The two pieces are then joined with right sides together. When turned the right way out the lining pulls the fabric and creates a hem with no stitching seen from the front. The theory being that once pressed the fabric has a nice crisp line at the edge.

***
Attaching the top bands; now this part was somewhat scary.
The idea is simple and straightforward enough, there is gathering tape, which you attach to the top of doubled over material. Then all that's left to do is the hem the bottom, pull the little strings and hang them up! Easy right? The stress though comes in making sure that the top is straight. I mean I guess it doesn't matter terribly because you could fix any wonkiness at the base hem but the pattern wouldn't be straight.
The idea is simple and straightforward enough, there is gathering tape, which you attach to the top of doubled over material. Then all that's left to do is the hem the bottom, pull the little strings and hang them up! Easy right? The stress though comes in making sure that the top is straight. I mean I guess it doesn't matter terribly because you could fix any wonkiness at the base hem but the pattern wouldn't be straight.
***
Finally all that is left to do is hang and gather.
***
So it's only taken me almost forever but finally both sets of curtains are finished and hung. They both have slightly different methods as they were a bit of a learning process but they look fantastic hung in our little caravan by the beach, although you're going to have to take my word for it because they're in such awkward places to take photos.

xx
xx
Caitlin


0 comments